GSAP ScrollTrigger Text Animation | Highlighting Text
Introduction
In this article, we'll learn how to create a fun and dynamic text highlighter effect on scroll.
To accomplish this, we'll employ an awesome CSS trick along with GSAP's ScrollTrigger plugin.
Here's a preview of the final result:
Initial HTML
We'll start by setting up our index.html with basic HTML boilerplate code. We'll also create a style.css file and an app.js file for our CSS and JavaScript.
Before the closing body tag, we'll link to the GSAP library, the ScrollTrigger plugin, and our own custom app.js file.
<!DOCTYPE html>
<html lang="en">
  <head>
    <meta charset="UTF-8" />
    <meta http-equiv="X-UA-Compatible" content="IE=edge" />
    <meta name="viewport" content="width=device-width, initial-scale=1.0" />
    <title>Document</title>
    <link rel="stylesheet" href="style.css" />
  </head>
  <body>
    <script src="https://cdnjs.cloudflare.com/ajax/libs/
gsap/3.11.3/gsap.min.js"></script>
    <script src="https://cdnjs.cloudflare.com/ajax/libs/
gsap/3.11.3/ScrollTrigger.min.js"></script>
    <script src="app.js"></script>
  </body>
</html>
GSAP installation page (for your reference)
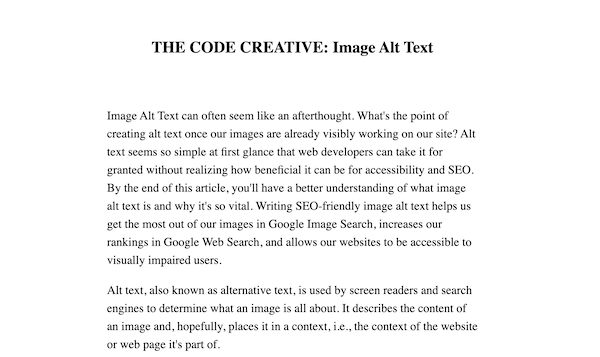
Adding Paragraph Text
Add a main tag and several paragraph text blocks, of your choosing, within the body tags.
The content is up to you, but you'll want to create enough paragraph text to get some vertical scrolling in the browser.
<body>
  <main>
    <h1>THE CODE CREATIVE: Image Alt Text</h1>
    <p>
      Image Alt Text can often seem like an afterthought. What's the point of
      creating alt text once our images are already visibly working on our site?
      Alt text seems so simple at first glance that web developers can take it
      for granted without realizing how beneficial it can be for accessibility
      and SEO. By the end of this article, you'll have a better understanding of
      what image alt text is and why it's so vital. Writing SEO-friendly image
      alt text helps us get the most out of our images in Google Image Search,
      increases our rankings in Google Web Search, and allows our websites to be
      accessible to visually impaired users.
    </p>
    <p>
      Alt text, also known as alternative text, is used by screen readers and
      search engines to determine what an image is all about. It describes the
      content of an image and, hopefully, places it in a context, i.e., the
      context of the website or web page it's part of.
    </p>
    <p>
      You might have also heard this described as being an “alt tag”. However,
      this seems like a misnomer to me. I prefer to use the term “alt text” or
      “alt attribute”. Although we are “tagging” the image in a way, an HTML
      "tag" is technically an element enclosed in angle brackets such as an h1.
    </p>
    <p>
      In the world of SEO, one of the most important things we can do is create
      a page accessible to search engines and users. This means creating alt
      text for each image on our site, ideally including keywords related to our
      content.
    </p>
    <p>
      In terms of SEO, web crawlers (that index and rank sites) have to rely on
      image processing algorithms. Search engine crawlers don't visually
      understand and interpret images in the same way a sighted user would.
    </p>
    <p>
      As we can imagine, by omitting this information from our images, there's
      less of a chance that Google will index them. When we say "index", we mean
      that these images won't show up in the Google Image Search results.
    </p>
    <p>
      Alt text is also an opportunity to use any keyword or keywords being
      targeted for SEO purposes. While we don't want to overdo it and stuff our
      alt text with these keywords, it is a good idea to use them in at least an
      image or two on the page.
    </p>
    <!-- ADD MORE PARAGRAPH TEXT...  -->
  </main>
  <script src="https://cdnjs.cloudflare.com/ajax/libs/
gsap/3.11.3/gsap.min.js"></script>
  <script src="https://cdnjs.cloudflare.com/ajax/libs/
gsap/3.11.3/ScrollTrigger.min.js"></script>
  <script src="app.js"></script>
</body>
Create tags for Highlighted Text
Let's wrap the text we'd like to highlight in span tags.
I've done so, in this example, in paragraphs three, five, and seven.
<body>
  <main>
    <h1>THE CODE CREATIVE: Image Alt Text</h1>
    <p>
      Image Alt Text can often seem like an afterthought. What's the point of
      creating alt text once our images are already visibly working on our site?
      Alt text seems so simple at first glance that web developers can take it
      for granted without realizing how beneficial it can be for accessibility
      and SEO. By the end of this article, you'll have a better understanding of
      what image alt text is and why it's so vital. Writing SEO-friendly image
      alt text helps us get the most out of our images in Google Image Search,
      increases our rankings in Google Web Search, and allows our websites to be
      accessible to visually impaired users.
    </p>
    <p>
      Alt text, also known as alternative text, is used by screen readers and
      search engines to determine what an image is all about. It describes the
      content of an image and, hopefully, places it in a context, i.e., the
      context of the website or web page it's part of.
    </p>
    <p>
      <span
        >You might have also heard this described as being an “alt tag”.</span
      >
      However, this seems like a misnomer to me. I prefer to use the term “alt
      text” or “alt attribute”. Although we are “tagging” the image in a way, an
      HTML "tag" is technically an element enclosed in angle brackets such as an
      h1.
    </p>
    <p>
      In the world of SEO, one of the most important things we can do is create
      a page accessible to search engines and users. This means creating alt
      text for each image on our site, ideally including keywords related to our
      content.
    </p>
    <p>
      In terms of SEO, web crawlers (that index and rank sites) have to rely on
      image processing algorithms.
      <span
        >Search engine crawlers don't visually understand and interpret images
        in the same way a sighted user would.</span
      >
    </p>
    <p>
      As we can imagine, by omitting this information from our images, there's
      less of a chance that Google will index them. When we say "index", we mean
      that these images won't show up in the Google Image Search results.
    </p>
    <p>
      Alt text is also an opportunity to use any keyword or keywords being
      targeted for SEO purposes.
      <span
        >While we don't want to overdo it and stuff our alt text with these
        keywords, it is a good idea to use them in at least an image or two on
        the page.</span
      >
    </p>
    <!-- ADD MORE PARAGRAPH TEXT...  -->
  </main>
  <script src="https://cdnjs.cloudflare.com/ajax/libs/
gsap/3.11.3/gsap.min.js"></script>
  <script src="https://cdnjs.cloudflare.com/ajax/libs/
gsap/3.11.3/ScrollTrigger.min.js"></script>
  <script src="app.js"></script>
</body>
Initial CSS
At the moment, our browser text looks pretty barebone. So, let's add a bit of basic styling in our style.css file.
These initial CSS rules provide some font sizing, center alignment, and spacing.
h1 {
  text-align: center;
  margin-bottom: 100px;
}

main {
  max-width: 45%;
  margin: 80px auto;
}

p {
  font-size: 1.5rem;
  line-height: 1.5;
}
The Linear Gradient Trick
To create the highlighted text animation, we'll employ a fun linear-gradient trick.
Here's how it works:
We'll create a rule for the span tags. This rule will contain the initial settings for the linear-gradient.
Set a background-image property with a value of linear-gradient and pass in 2 color stops. I'm using yellow for both to emulate a traditional text highlighter effect.
span {
  background-image: linear-gradient(yellow, yellow);
}
For the background-size, we'll use the two-value syntax. This will allow us to set the initial width and height of the background gradient. We'll set the first value(width) to 0 and the second value(height) to 100%.
We'll also need to set a background-repeat property to no-repeat. Otherwise, the gradient will repeat for the full width of the span and prevent our animation effect.
span {
  background-image: linear-gradient(yellow, yellow);
  background-size: 0 100%;
  background-repeat: no-repeat;
}
Now, set a transition property and assign it to background-size. We'll also set a duration of 1s and an easing of ease-in. You can adjust these to taste, however.
Ultimately, we'll create a class called active and trigger this animation on scroll via JavaScript and ScrollTrigger.
But for now, to test our work manually, let's use a hover pseudo-class on the span to test our animation transition. On hover, we'll set the background-size to a width of 100% and a height of 100%.
span {
  background-image: linear-gradient(yellow, yellow);
  background-size: 0 100%;
  transition: background-size 1s ease-in;
  background-repeat: no-repeat;
}

span:hover {
  background-size: 100% 100%;
}
Initial App.JS
Moving over into our app.js file, we'll start by registering the ScrollTrigger plugin:
gsap.registerPlugin(ScrollTrigger);
Then, we'll use a utility method provided by GSAP called toArray.
toArray will gather all the span tags from the HTML markup and put them into a flat JavaScript array.
This will allow us to use JavaScript's built-in forEach method to iterate over each span element.
gsap.registerPlugin(ScrollTrigger);
gsap.utils.toArray("span").forEach((span) => {});
Then, on each iteration, we'll create a standalone ScrollTrigger instance using ScrollTrigger.create().
gsap.registerPlugin(ScrollTrigger);
gsap.utils.toArray("span").forEach((span) => {
  ScrollTrigger.create({});
});
Standalone ScrollTrigger's make it easy for us to toggle classes and tap into GSAP's event callback system.
So, for each standalone ScrollTrigger instance, we'll set the trigger to be the span from the current iteration.
And we'll set the start property to be top and center.
Now, when the top of the trigger element meets the center of the viewport, we can toggle a class using the toggleClass property.
We'll call this class active. And this class will replace the span:hover rule we set previously in our CSS file.
gsap.registerPlugin(ScrollTrigger);
gsap.utils.toArray("span").forEach((span) => {
  ScrollTrigger.create({
    trigger: span,
    start: "top center",
    toggleClass: "active",
  });
});
span {
  background-image: linear-gradient(yellow, yellow);
  background-size: 0 100%;
  transition: background-size 1s ease-in;
  background-repeat: no-repeat;
}

.active {
  background-size: 100% 100%;
}
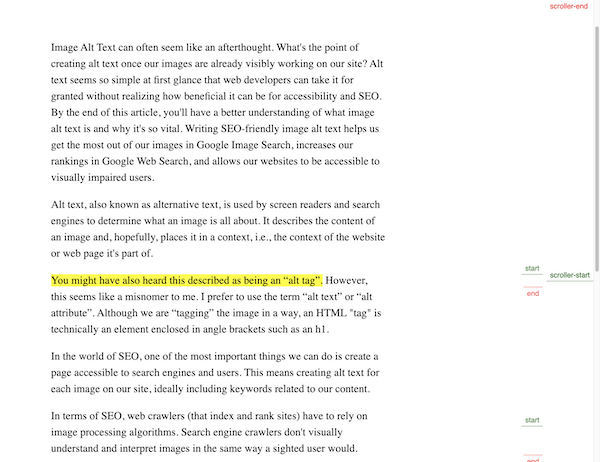
Enabling Markers
Finally, let's enable some markers to visualize the scroller zone in the viewport.
Notice now that when the trigger element enters the scroller zone, that background-image linear-gradient animation is triggered.
gsap.registerPlugin(ScrollTrigger);
gsap.utils.toArray("span").forEach((span) => {
  ScrollTrigger.create({
    trigger: span,
    start: "top center",
    markers: true,
    toggleClass: "active",
  });
});
Using the onEnter Callback Event
At the moment, if the scroll direction reverses, the linear-gradient's width reduces back to zero. This is because the class gets toggled.
However, if we want the active class to apply without toggling in reverse, we can use a callback property called onEnter and assign it a function.
This function will add the active class when the trigger element enters the scroller zone.
gsap.registerPlugin(ScrollTrigger);
gsap.utils.toArray("span").forEach((span) => {
  ScrollTrigger.create({
    trigger: span,
    start: "top center",
    markers: true,
    onEnter: () => span.classList.add("active"),
  });
});
Conclusion
In this article, we learned how to create a fun, dynamic text highlighter animation effect. We transitioned the background-size of a linear-gradient via CSS and then controlled the point at which the animation occurred with GSAP's ScrollTrigger plugin.
If you're more of a visual learner, check out the video version of this article: